Pages

Tuesday, August 30, 2011

I Love Chick-Fil-A!!!

You will never guess what I just found!  I was looking at my new addiction (pinterest.com) and found this.  I can't wait to try it!  If you get to try it before I do, please let me know what you think of it.  The girl whose website this came from is bystephanielynn.com

Chick-Fil-A Inspired Chicken 
 
Cooking Oil {you can use Peanut but it is not necessary}
1 Egg
1 Cup of Milk
1 Cup of Flour
2 1/2 Tablespoons of Powdered Sugar
1/2 Teaspoon Pepper
I Tablespoon of Salt
2 Skinless Boneless Chicken Breast, cut in strips or cubed

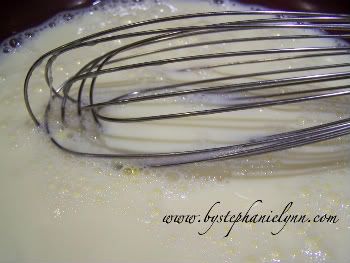
Mix together Egg and Milk.

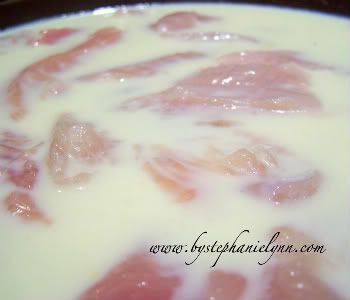
Place cut chicken in mixture and let sit.

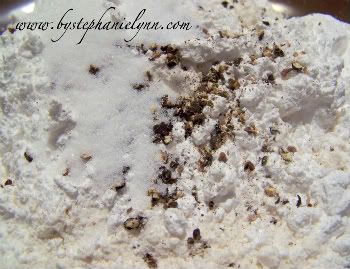
While the chicken is sitting, in a separate bowl, mix together the Flour, Powdered Sugar, Pepper and Salt. Dredge the chicken pieces in the flour mixture. I always like to double coat the chicken so I repeat these two steps.

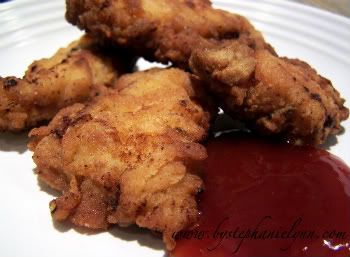
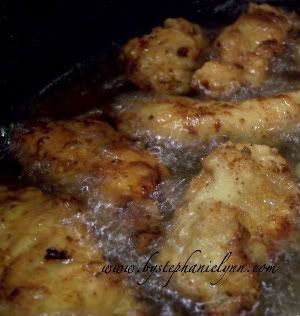
Heat the oil to 375 degrees. You can use a deep fryer or I simply heat in a frying pan on the stove top. The coating makes the oil pretty messy and I just prefer to use a frying pan and discard the oil afterwards. Gently drop your chicken pieces in the heated oil and cook until golden brown.

Monday, August 29, 2011

Butter Beans

I had someone request how to make good butter beans.  It's really not hard; you just need a little time.  I use  dried beans when I make them.

Butter Beans

1  16 oz. bag of dried beans
Enough water to keep beans covered
1/4 to 1/2 tsp. baking soda
1 Tb. butter
1/2 package ham seasoning

I pour the bag of beans into a large pot and cover it with water about 2 inches above the "bean line."  Bring the beans to a boil and put in about 1/4 to 1/2 tsp. of baking soda.  The water will fizz for a minute, but the baking soda softens the beans.  Then add salt to taste, 1 Tb. of butter, and 1/2 package of ham seasoning.  Turn the stove off, cover the beans for about 2 hours and let them sit.  Check on the beans after an hour to see if you need to add more water because the beans will swell.  Cook for about another hour and they should be done.

Let me know if you have anything in particular you need to know how to cook.  I'll do my best to help you.

Sunday, August 28, 2011

This One's For You, Daddy!

I have had my Daddy on my mind all day.  He always liked dried butter beans, corn bread, and collard greens.  I never liked collard greens, but my husband does.  So I went all out today and made a meal fit for a king.  A king that lives in the South, that is.  A king that is called hubby or Daddy.  I have to admit, I didn't cook the meat.  Kroger had a sale on ribs that were already cooked.  It was such a good deal, I couldn't pass them up.  Here's what dinner looked like.

Hubby claims the collard greens were the best yet.  I was willing to take his opinion for it.  The thought of putting that grass-like substance in my mouth was revolting.  GAG!  Here is what I did when I cooked them.

Collard Greens

1 package frozen collard greens
Enough water to cover the greens
1/2 package of ham seasoning
1/2 tsp. sugar
1/2 tsp. salt
1 Tb. butter

Mix all together and bring to a boil.  Reduce heat and simmer for about an hour.


I did enjoy the ribs, cornbread, and butter beans.  And I thought of my Daddy with every bite I took.  This one was for you Daddy!  You would have loved it.

Two Week Menu

 The beginning of a new school year is crazy.  Things have started to settle down a bit so hopefully I can spend a little more time on the blog.    I have come up with a new menu for the next 2 weeks. I hope this helps you.

Monday - Chicken leg quarters on the grill
Tuesday - Italian Sausage Casserole
Wednesday - Stouffer Dinner
Thursday - Baked Fish
Friday -Chili Dogs

Monday - Ribs
Tuesday - Country Fried Steak and Gravy
Wednesday - Crunchy Onion Chicken
Thursday -Hamburgers
Friday -Corn Chowder


Corn Chowder

¾ cup celery, chopped
1 small onion, chopped
¼ cup butter
1 ¾ cups milk
2 cans cream of chicken soup
1  16 ½  oz. can of whole kernel corn, drained
½ tsp. basil
½ tsp salt
Dash of pepper

Sauté celery and onion in butter until tender.  Add remaining ingredients and heat.  Stir frequently, but do not boil.              Serves 4-6


Thursday, August 25, 2011

Rich and Yummy!

I made this recipe for a group today and they all seemed to enjoy it.  It's very rich and you can only eat small portions at a time.  Make sure you have plenty of milk!

Chocolate Chip Cookie n’ Oreo Brownie Bar
1 bag of Betty Crocker chocolate chip cookie mix
16 double stuff Oreo cookies
1 8x8 sized brownie mix


Preheat oven to 350 degrees F.  Mix the cookie mix according to the package.   Spread the cookie dough in the bottom of a 8x8 baking dish that’s been sprayed with baking spray. Top with a layer of 16 whole Oreos. Mix together brownie mix and pour the brownie batter over the cookie dough and Oreos. Bake at 350 degrees F for 55 minutes.

Sunday, August 21, 2011

Planning Ahead

I went to the grocery store today and decided to cook up some packs of ground turkey so it would be ready to use for a quick meal.  I go ahead and cook it completely then chop it up in my little food processor.  I divide it into one pound packages and put it in the freezer.
Here's a recipe I got from my daughter.  It's quick and easy when you have already cooked the ground turkey.


Taco in a Pan

1 lb. ground turkey (or beef, if you prefer)
1 packet taco seasoning
1 cup water
2 cups quick cooking brown rice
½ cup shredded cheddar
Shredded lettuce
Chopped tomatoes
Sour cream
Tortilla chips
Optional:  salsa, pinto beans or black beans, chopped green onions, sliced black olives

Brown the meat, drain, and chop.  Add water and taco seasoning to the skillet; mix together.  Add beans now if you choose.  Bring to a boil.  Add rice and top with cheese.  Cover and simmer for 5 minutes.  Crush tortillas chips onto your plate.  Add mixture on top.  Then top with lettuce, tomatoes, sour cream, and any other toppings you like. 


I checked my tomato plant today and found a nice surprise.  I'll be using these this week!

There were two more, but I sliced them up for dinner. 

Saturday, August 13, 2011

Chilly Yet?

 Is it cold where you live?  It's certainly not cold in Georgia yet!  When the weather does start to turn cold, there's nothing better than a bowl of chili for dinner.  Chili is also one of those foods that you can freeze whatever you have left over for dinner another night.  I'm posting two different kinds of chili.  Both are delicious and can be made in the crock pot or a pot on the stove.  I bet you know which way I prefer to cook it! 

White Chicken Chili

1 whole chicken breast, cooked and shredded
1 medium onion chopped
1 can Rotel (you don't have to drain)
1 packet of chili seasoning
1 can navy beans or great northern beans
1 can black beans (be sure to drain)
1 can cream of celery or cream of chicken soup
1 cup of sour cream - maybe a little less
1 carton (I think it is a quart) low sodium chicken broth
1 cup shredded cheddar cheese
1 small can of corn, drain
½ cup Half and Half

Saute onion in oil. Add Rotel, cream soup, and sour cream. Cook until smooth. Stir in chili seasoning. Add beans and chicken. Then add chicken broth. Bring to a low boil and then simmer for 30 - 45 minutes. Add shredded cheese and corn and stir until cheese is melted.  Add about a half cup of half and half to it to make it a little less spicy.

Chili

2 lb. ground beef or turkey or a meat substitute
2 cans Mexican style tomatoes
2 cans of red kidney beans, drained
2 medium onions, chopped
3 Tb. chili powder
1 small can tomato sauce
1 bell pepper, chopped – optional
salt, pepper, garlic powder to taste

Brown the meat and drain.  Chop into small pieces (I put mine in my little chopper).  Put all ingredients in a crock pot and cook on low for 8 hours.

Tuesday, August 9, 2011

That's Just Peachy!

The microwave has become an appliance I cannot live without.  When I was growing up, we didn't have a microwave.  I was well into my teenage years before we had the giant, magical box in our kitchen.  It was amazing and we quickly learned we could not do without one.  It saved a person from having to wash pots and pans to melt butter, saute onions, or reheat leftovers.  Later I got married and guess what.  We didn't have a microwave.  Two months later was Christmas and my wonderful husband surprised me with a microwave!!  Yeah Hubby!  About a month ago we came home from vacation and discovered the microwave was broken.  It would turn on.  It just wouldn't heat anything.  At first, I had a moment of panic.  Then I remembered I had a little, old (and I mean old) microwave that I used to have in my classroom. Unfortunately, the county I work in made us remove lamps, microwaves, and refrigerators from out classrooms in order to decrease the budget for utilities. Even though I miss it in my classroom, having it at home was a lifesaver!


Hubby and I went shopping at a local home store and found a new microwave.  I was excited and ready to take it home.  The salesperson came out and said it was out of stock in the color I needed, but they could order it.  However, it would take a week for it to come in.  O.K.  I could deal with that ... only because I had a sad excuse for a back up at home.  The microwave came in as promised.  The company that was supposed to install it was not very cooperative when it came to working with our schedule and a need to have it delivered during the A.M. hours.  Long story short, we picked up the microwave and had to find someone to install it.  Hubby would normally be able to do it, but he had recently had elbow surgery and couldn't lift.  Luckily for us, we knew someone who could do it.  My son's Sunday School teacher came over and installed it for us after he got off work one night.  He has no idea how helpful this was for us.  He just kept saying it was no big deal.  For us, or rather ME, it was a VERY big deal!  Then he wouldn't let us pay him!!  So I start thinking, "What can I do for him?"  This good deed was NOT going to go unrewarded!  As we talked, I found out he really liked peaches and I knew instantly what I was going to do.  There was going to be a peach cobbler in his future!  I delivered the cobbler to him and his family Sunday afternoon.  I have posted the recipe for the rest of you to enjoy.  Thanks Jeff for helping us out.  You are awesome!


Peach Cobbler

1 stick of butter, melted
1 cup of sugar
1 cup of milk
1 cup of self-rising flour
1 ½  tsp. cinnamon
1  29 oz. of canned sliced peaches.

Mix first 5 ingredients together in a 9x13 baking dish.   
Add peaches with juice.  I like to cut the peach slices in half. 
Mix well and sprinkle a little more cinnamon on top.  Bake at 350 degrees for 1 hour.  Crust forms by itself.

Saturday, August 6, 2011

What A Week!

What a week it has been!  This was my first week back to work before the new school year begins.  It included getting to see co-workers again and catching up, meetings, writing and preparing lesson plans, reviewing files, laminating miles of new material I made over the summer, cutting miles of laminating, writing student names on a million things, sorting supplies, and meeting my new students.  The list goes on and on.  Meeting my new students is the best part.  You learn so much during that first meeting.  Looks like I have some real sweeties this year!

The typical work day during pre-planning week ends up being about 10 hours long.  I was so grateful that I had dinner in the freezer for this week.  Otherwise, my family would have starved.  By Friday night, my husband loving told me how exhausted and bad I looked when I got home at 8:00 p.m.  No kidding!  I started my day at 7:00 a.m.  I did have one little glitch this week.  Normally I take dinner out of the freezer the night before.  This time I forgot and took dinner out of the freezer before I left for work and put it in the refrigerator.  It was still frozen when I came home.  Thank goodness it happened before I had hit my zombie stage later in the week.  Luckily, I had found another easy recipe I wanted to try.  I went to the store and picked up a couple of things I needed and whipped it up.  It's really easy so you have to try it.  And you cook them on the grill so the kitchen doesn't heat up!

Chicken Burritos

1 can (15 oz.) pinto beans, drained
1 cup  frozen corn, drained
3/4 cup salsa
1/2 cup  chopped red or yellow peppers
3 green onions, chopped
1/4 cup  chopped fresh cilantro
2 cups shredded Mexican Cheese
8   flour or wheat tortillas at room temperature
2 cups cooked chicken strips

Preheat grill to medium heat.
Spray 8 large heavy-duty foil sheets with cooking spray; set aside. Combine first 6 ingredients.
Place 1/4 cup cheese on bottom half of 1 tortilla; top with 1/3 to 1/2 cup bean mixture and 1/4 cup chicken, leaving 1-inch border around bottom and side of tortilla half. Fold bottom edge of tortilla over filling, then fold in opposite sides of tortilla and roll up. Place, seam-side down, near bottom edge of 1 prepared foil sheet; roll up to enclose burrito. Fold both ends of foil to seal. Repeat with remaining tortillas and filling.
Place the burritos on the grill and close the lid.  Cook for 9 min. turning every 3 minutes.

You can add sour cream, olives, or more salsa after the are cooked.